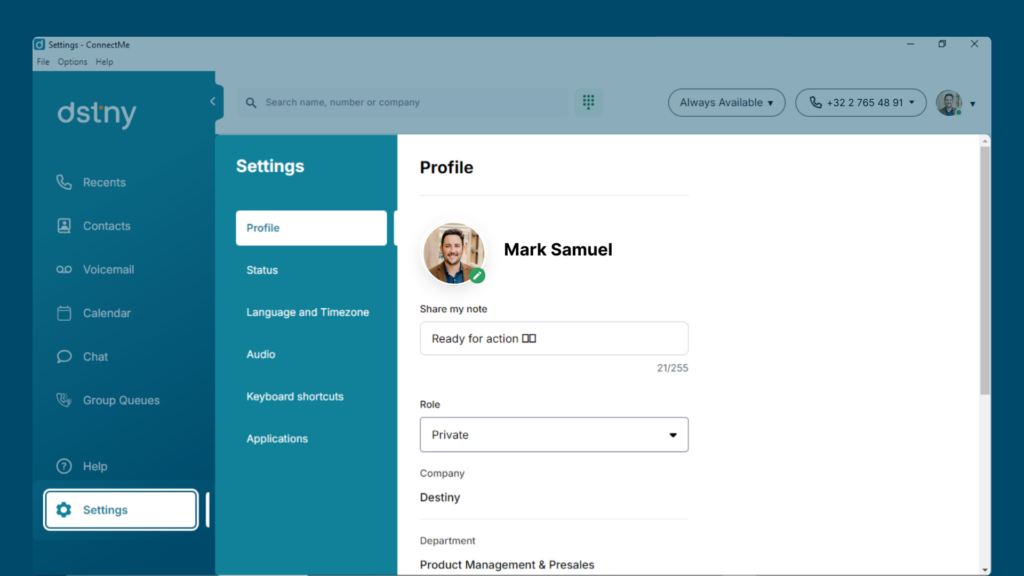
Navigating
Step 1: Using the Search Box
The search box is your main tool for connecting with contacts.
How to Use the Search Box:
- In the top section, type in a phone number, name, company, or other details to find someone or initiate contact.
- Press Enter or click the search icon to begin the search.
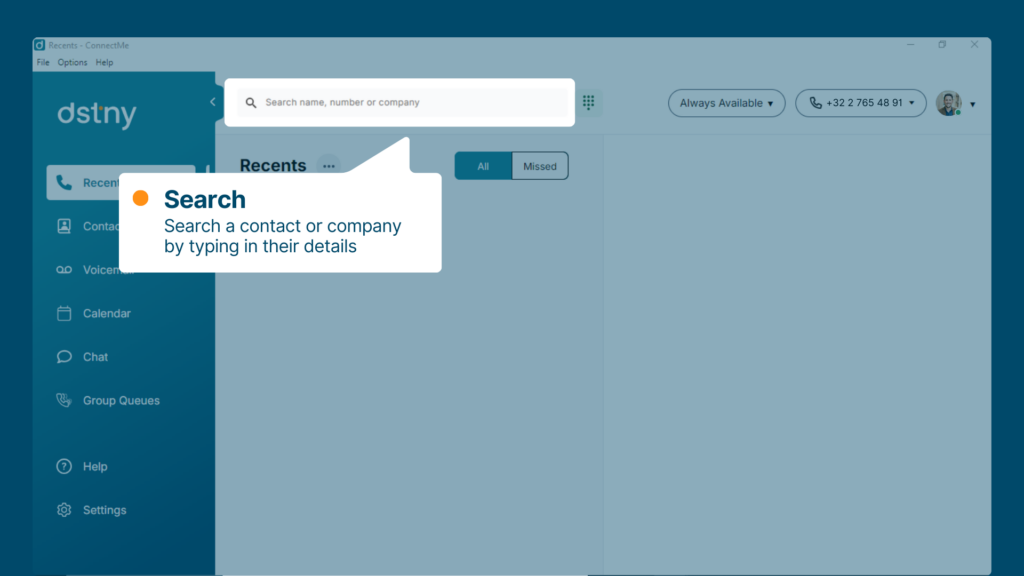
Step 2: Accessing the Dial Pad
The dial pad allows you to dial a number manually.
How to Use the Dial Pad:
- Click on the dial pad icon to open the number pad.
- Enter the phone number and click the call icon to initiate a call.
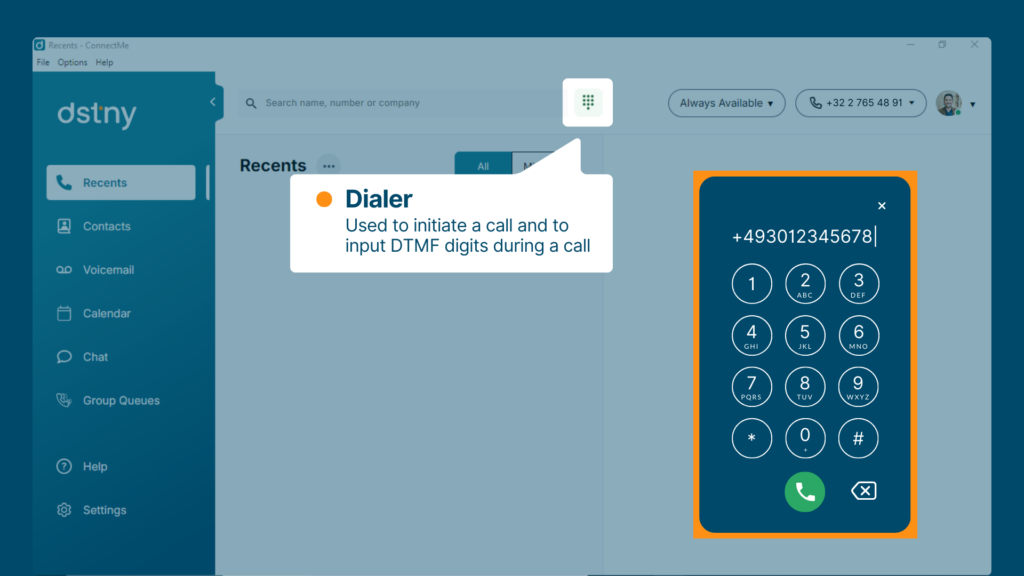
Step 3: Setting Your Availability
Display your availability to other users and manage how your incoming calls are handled.
How to Set Your Availability:
- In the present state section, choose how you want to be displayed to others.
- You can set your availability status and determine how calls will be routed.
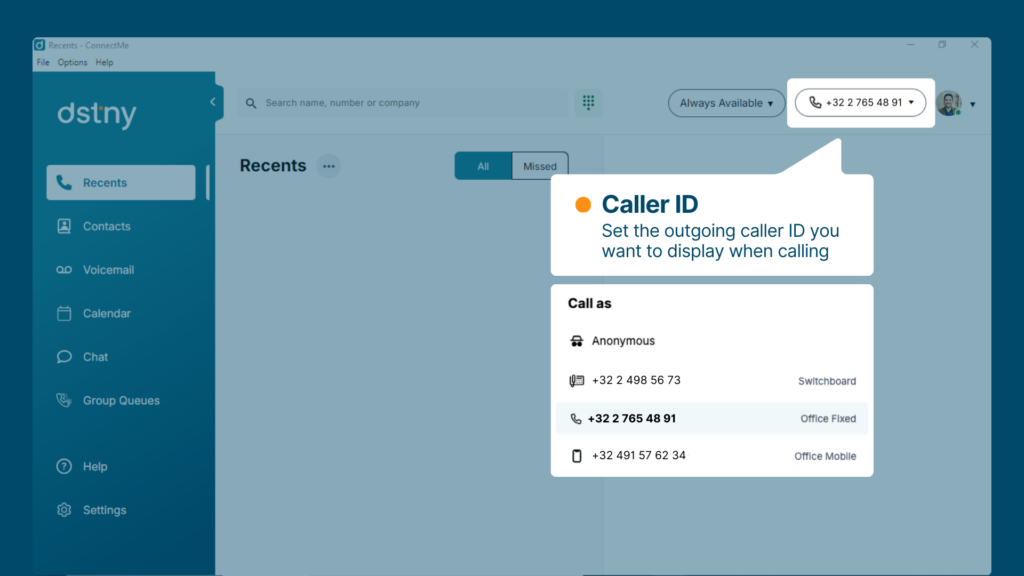
Step 4: Managing Your Caller ID
Choose which phone number to display as your outgoing caller ID.
How to Set Your Caller ID:
- Click the dropdown menu in the caller ID section.
- Select the desired phone number linked to your profile.
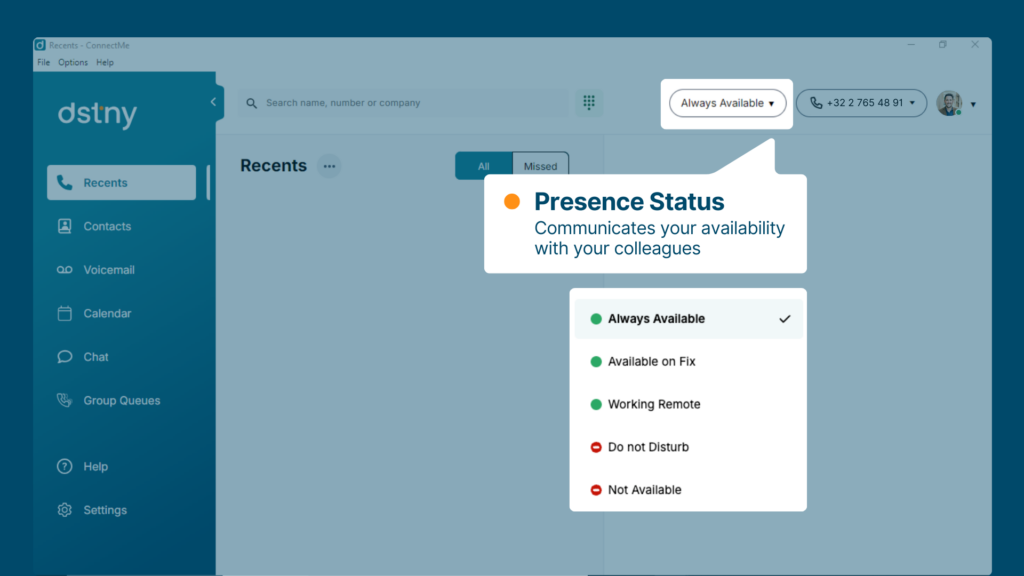
Step 5: Accessing Your Profile
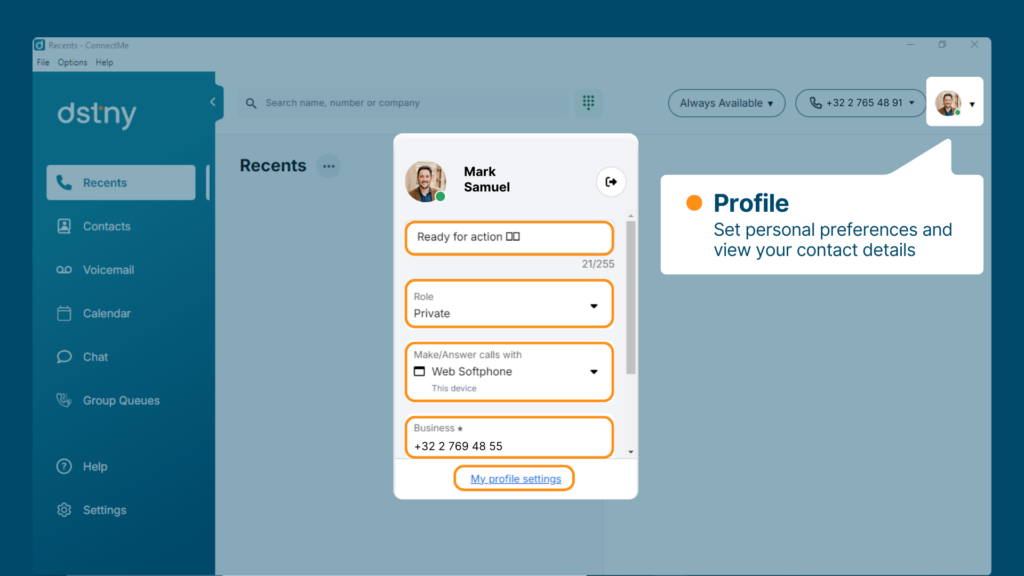
View and edit your profile details, including contact info and device settings.
How to Access Your Profile:
- Click the arrow next to your avatar to open your profile.
- Review or edit your details, set a custom note for colleagues, or choose which device to make and answer calls on.
Step 6: Navigating the Left Menu
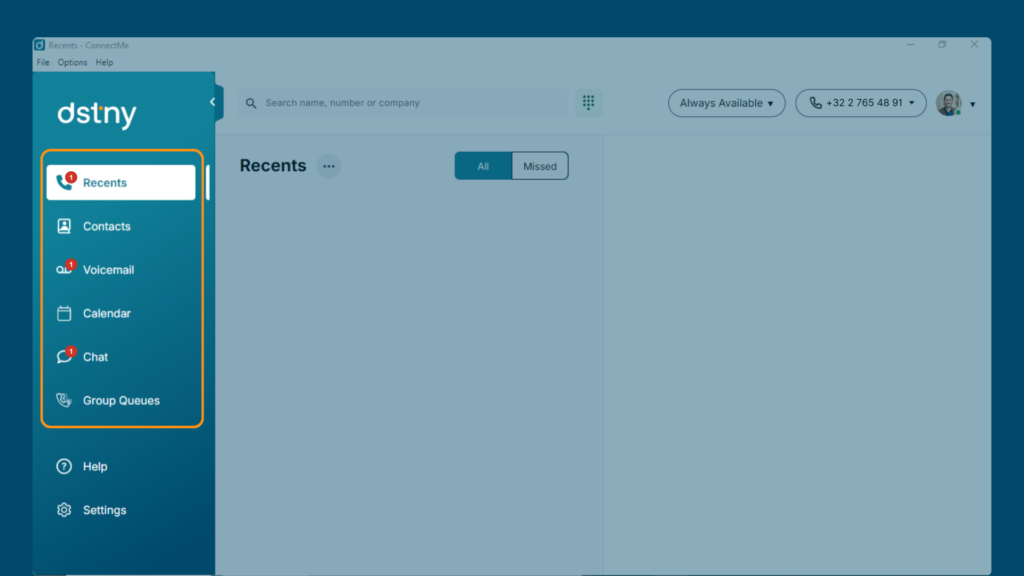
The left navigation menu shows your notifications, call history, and various features.
How to Use the Navigation Menu:
- In this menu, you’ll find notifications for missed calls, voicemails, and chats.
- Access recent calls, contacts, and more based on what modules are activated for your profile.
Step 7: Reviewing Call History
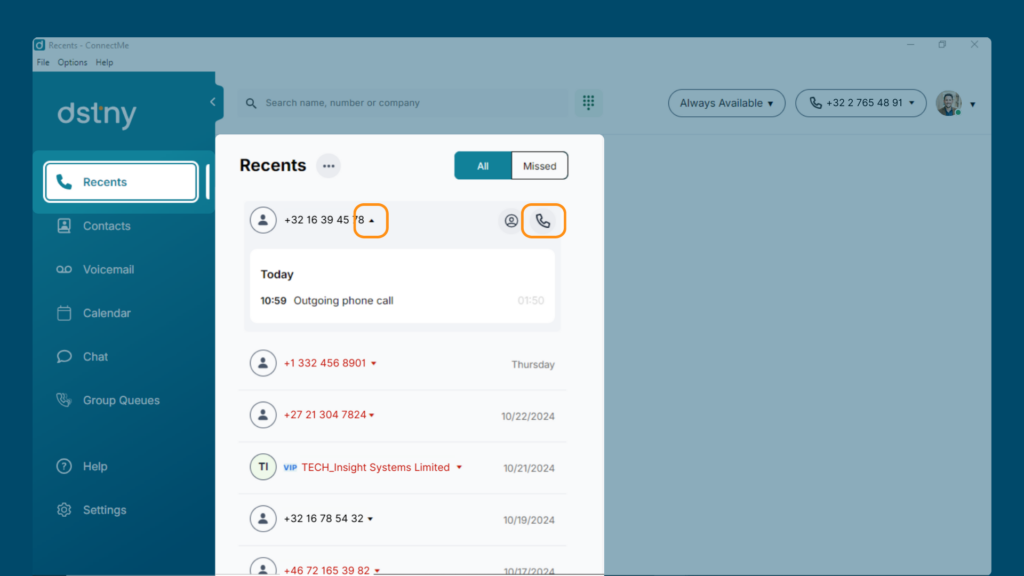
View your dialed, missed, and received calls.
How to View Call History:
- Under Recents, find your call history.
- Hover over an entry to reveal the call icon to dial the contact or click the arrow to view call details.
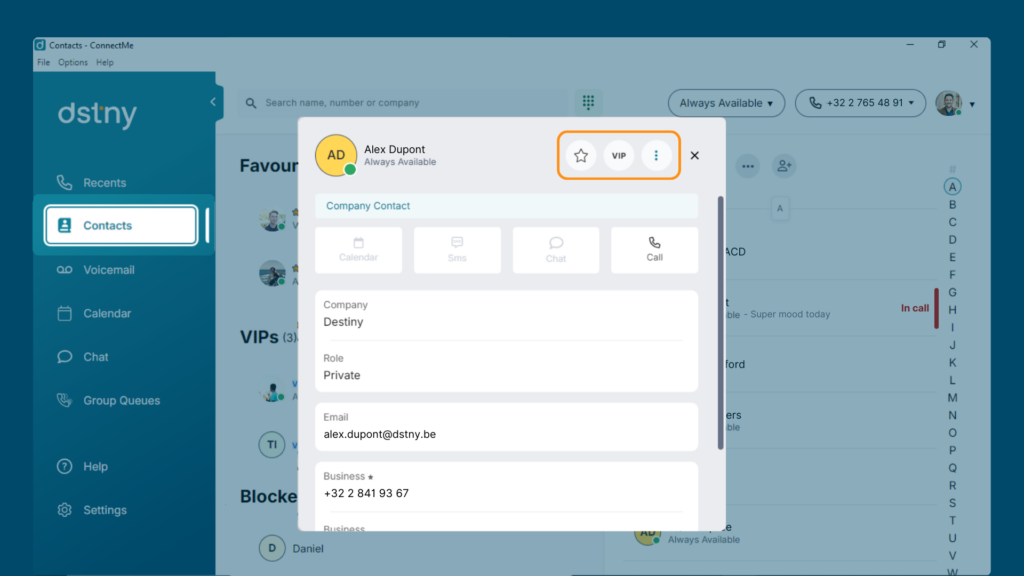
Step 8: Managing Contacts
You can organize your contacts into groups like favorites, VIPs, and blocked contacts.
How to Manage Contacts:
- Go to the Contacts section.
- Open a contact’s profile and click the desired group (e.g., Favorites, VIPs) to add them.
Step 9: Managing Voicemails
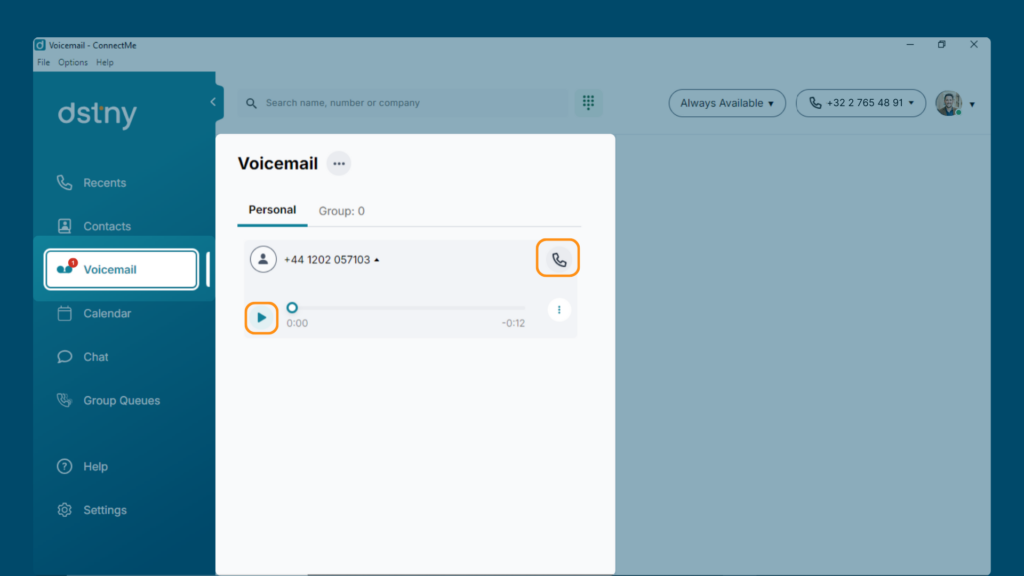
Access and manage both personal and group voicemail messages.
How to Manage Voicemails:
- Go to the Voicemail section.
- Hover over a voicemail to reveal options to play the message or return the call.
Step 10: Using the Calendar
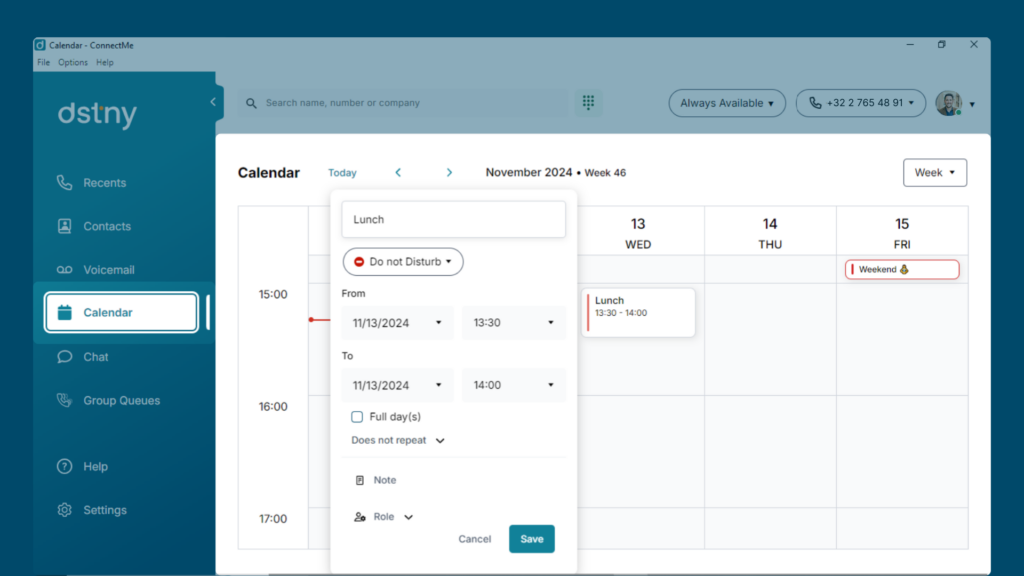
The calendar helps set your status and manage availability.
How to Use the Calendar:
- Open the Calendar to set your status for specific times.
- Choose the status to display your availability and manage how incoming calls are handled during that time.
Step 11: Using Chat for Conversations
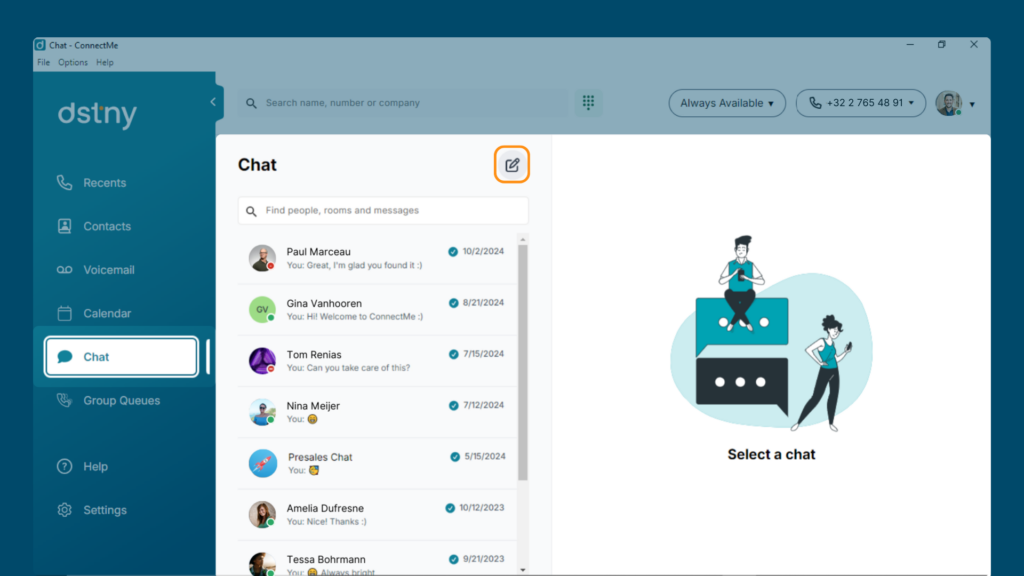
Access one-to-one and group chats.
How to Use Chat:
- Open the Chat section.
- Start a chat with a colleague or create a group by clicking the icon in the top right corner.
Step 12: Accessing Group Queues
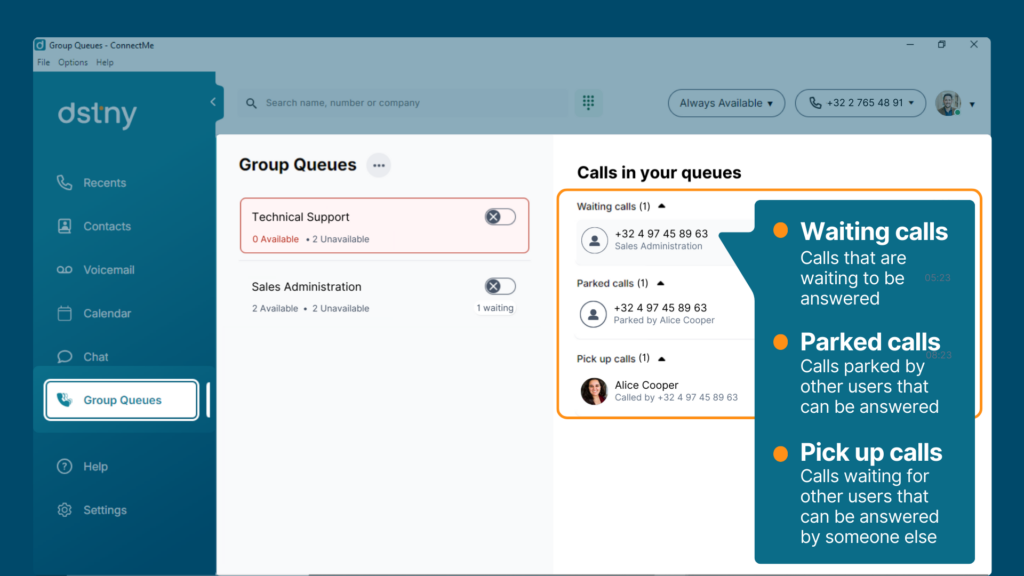
Group queues show company calls and call distribution groups.
How to Use Group Queues:
- Go to the Group Queues section.
- View calls waiting to be answered, parked calls, or calls you can pick up on behalf of others.
Step 13: Help and Settings
Access help and configure settings.
How to Access Help & Settings:
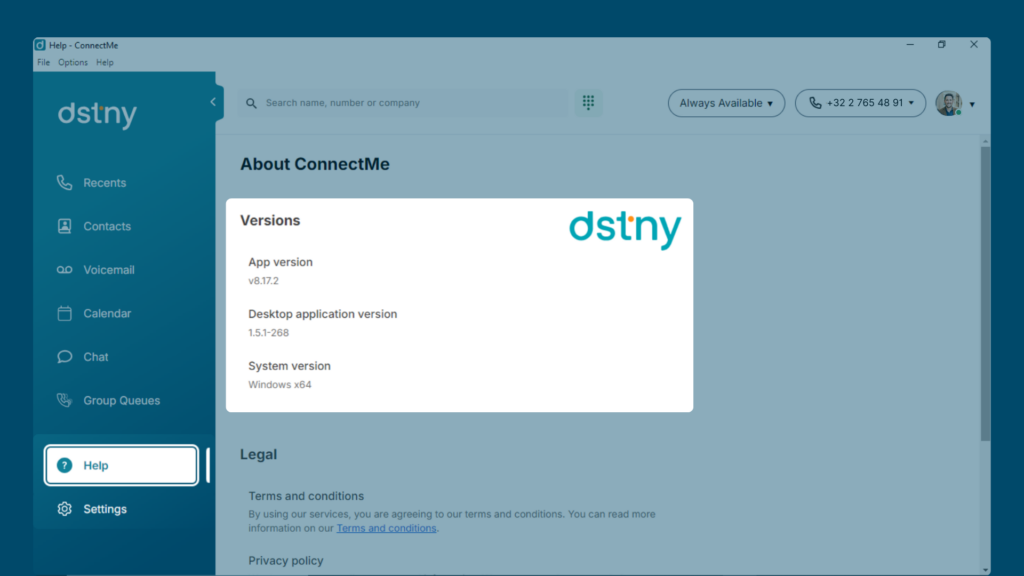
1. Scroll to the Help section to see your software version.
2. Click Settings to adjust call forwarding, language, timezone, and audio options.